First, how do we tell the page where to find the CSS? Well, there are 3 ways. First there is "in-line" where we define the CSS in the HTML page right at the element that we're styling. You might have noticed that yesterday when I was styling the <div> and <spans>...

In the code on the left you can see the attribute "style" in the <div> and <span> elements. That's the in-line styling. But we can also put the styling at the top of the page, in the <head> section. If we do that, though, we need some way to tell the style what elements to style. So, we can add a "selector" saying what elements to apply the style to. In this case, we'll add the blue border to every <div> tag and the red border to every <span> tag...

The third way we can add styling is perhaps the most common, we'll link to an external file. We first create the link by adding a line to the <head> section pointing to our stylesheet file (which is usually "default.css" or something similar). Then, in the stylesheet we'll change styling by element to styling by class, which looks like .className (a period and then the name)...


If we want to style by an ID, we write it this way: #IDname (the hash, or pound sign, then name)...


Okay, so that's a quick look at where to put styles and how to select the elements to style, so what all can we do with CSS? Well, we've looked at the "border" property - the quick version of it takes the size of the border (which I'm giving in "pixels" (px)), then the style of the border (a solid line so far), and then the color of the border. Let's look at a few more borders...

Besides styling around an element with a border, we can also style an element itself...


Another really big thing we use CSS for is positioning. Getting everything exactly where you want it is tricky, because you have no idea what device the user is on, a 32" desktop monitor or a 5" phone? Is the browser taking up the whole window or, like me in these examples, is the browser only filling up half the screen? Browsers try to dynamically grow and shrink elements to fit in the best way possible - using CSS we can force elements to be positioned a certain way.
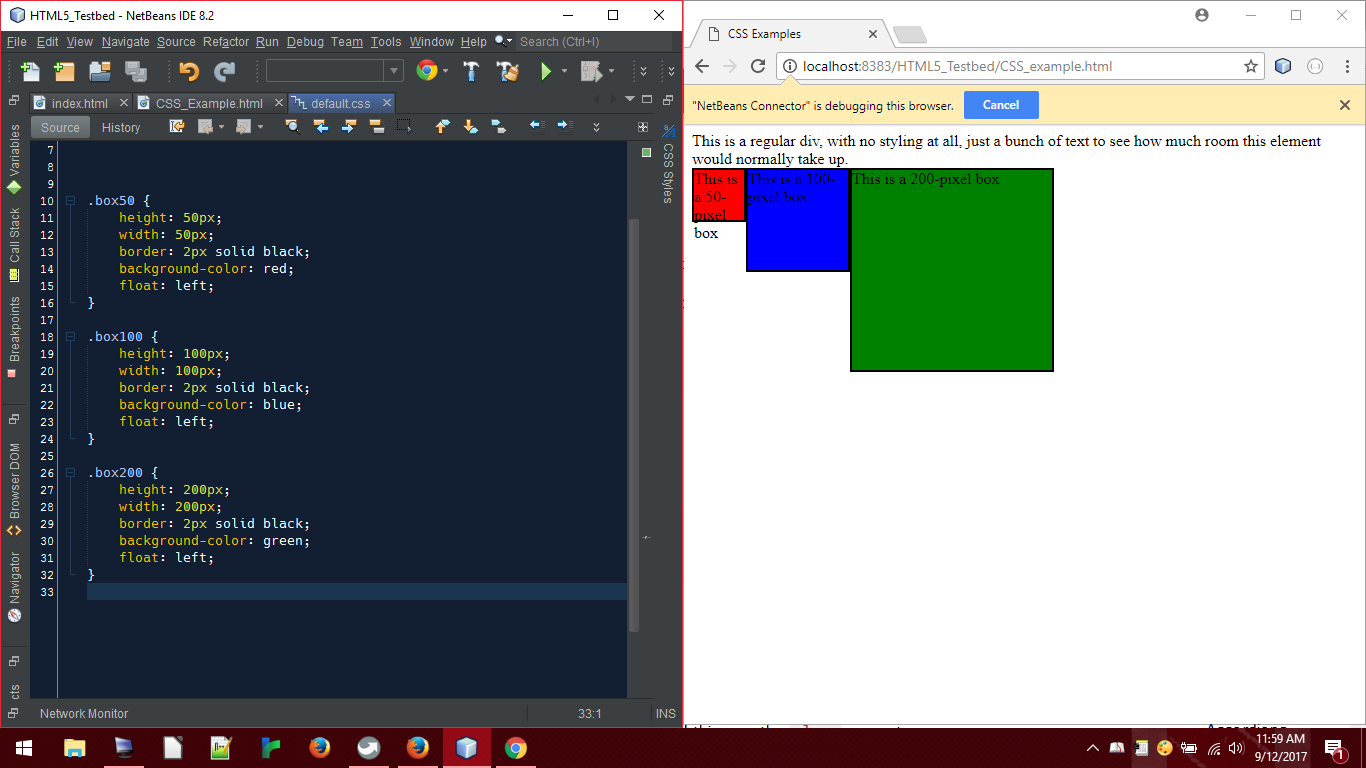
Let's start be forcing how big something should be...


The boxes look weird all lined up vertically, let's arrange them horizontally by using the property float: left...
The little 50px red box is too small for the text in it, so let's set the overflow: hidden property to hide the excess (we could also set overflow: scroll if we wanted to add scrollbars, but those would look weird on such a small element)...

I've been hard-coding sizes with pixels, we could also set the size as a percentage of the screen...

We set the "padding" to put empty space between the contents and the element...

And setting a "margin" will put empty space between the element and other elements...

We can also define where an element should appear relative to another element or the screen itself. Here is a <div> with a black background and some red, blue and green <div>s within it. This is how they look with no positioning at all...

Here they are with the float: right for the red box and float:left for the green and blue...

Now I'm going to set clear: left for the blue box, which will move it down ("clearing" any elements from being on it's left side)...

The position property describes where to place things on the screen. Setting position: absolute will let you give a distance from the container (from the top and left sides here) to display each element at...

While we defined our own classes for the elements, CSS also has "pseudo-classes" that describe how an element is interacted with. Here I'm adding the pseudo-class :hover so that when the mouse hovers over the red box it will turn white...


Okay, again I am only giving the quickest introduction to CSS here, something to hopefully let you start imagining how you can position and style the elements of your pages. For a far better description of CSS, and a great reference, visit the w3schools.
One more whirlwind tomorrow when I'll go over JavaScript. Then, on Thursday I'll pull it all together and show you how to make a Twine-like display using all three. Until then!
No comments:
Post a Comment