Showing posts with label Open2 Engine. Show all posts

Saturday, November 11, 2017

Open2 Engine: Bookworm - part 5 - Changing Themes

    Okay, so the last post took an unexpected turn.  I was blissfully unaware of how tricky it would be to change the look (or "theme") of Bookworm.  It wouldn't be so bad if it was a simple HTML application, but since I'm also using jQuery UI that means I need to go through some extra work.  I like the styling of the jQuery UI widgets, you could create the same, or at least very similar, widgets in plain HTML and CSS - but I also like the experience of working with a JavaScript library.  You need to look at your code differently when you're adding someone else's library - case in point how I didn't consider that jQuery UI would have it's own stylesheet.  And it turns out that the JQUI stylesheet is kind of complicated.  So let's look at how it handles themes...


ThemeRoller
    There is a great place to go for JQUI themes, a site called ThemeRoller...


Here you can change everything about how JQUI looks.  When you get done and click on the link to download your theme though, it gets a little weird.  You get taken to this download page....


And there are a lot of checkbox options...


At the bottom of the page it actually mentions something about themes...


What you download is a zip archive with a lot of files in it...


 If you leave everything checked, like I did, you get quite a few files and directories.  You get a lot more than just the theme you were working on; you end up with the jQuery UI JavaScript file, the jQuery JavaScript file, a package.json for your package manager, some other stuff, and several CSS files.  The first thing to note are the jquery-ui.css and the jquery-ui.min.css files...


These are the JQUI stylesheets, both of them, but the second is the "minified" version.  You get this with things that go over the web.  Just like a zip archive is a compressed format to reduce the time a download takes, a minified file has extra whitespace removed and usually names for variables and functions have been shortened.  It makes for a smaller file, but at the cost of something that is difficult if not impossible for a person to read.  Here is a screenshot of the full and minified files side-by-side in Notepad++...


So those are two of the files, basically the same information just in different formats.  Which happens again...


The jquery-ui.css is the full stylesheet, but there are also jquery-ui.structure.css and jquery-ui.theme.css files.  These last two (and their minified versions) are just two halves of the full stylesheet.  The 'structure' file has the CSS elements for positioning and size, the structural elements; while the 'theme' file has the colors and appearance elements.  This could be useful to split up in some cases, and I think I'll use these for my theme switcher - I'm not changing any of the structure, just the appearance, so why load anything bigger than I have to?
    Another thing I want to point out is the way JQUI uses icons...

 JQUI can display its icons in different colors, it does that by loading from a different image file.  If you look at the filenames you can see that each has the 6 digit hex color code after the "ui-icons_" beginning.  So I need all these files to be together in a folder called "images" that's in the same folder as the css files.


Changing Themes, done right this time
    Now that I know how the JQUI themes are created, and what files to load, and have a site to create new themes - now I can actually impliment the theme-switcher.  So this is going to be in two parts.  First there is the background color which is my basic CSS, located in my own bookworm.css file.  The second part is the JQUI theme.  I'm making two versions of each JQUI theme, both will have the same primary color, like blue, but one will be designed for a white background and the other for a dark background (I'm going to soften it to a dark grey instead of the pure black I did before).  So when I swtich themes I need to change two things.  I wasn't sure about how hard it was going to be to change the themes, I had a picture in my head of some complicated coding - I even found a special theme switcher widget.  Thankfully I was wrong, because I found another site that has a wonderfully simple solution.  Niklas Tech Blog has a great way to switch JQUI themes with a simple drop-down.  All I need to do is add a line of JavaScript to also change the background CSS at the same time and I'll have a winner.  Hopefully :)  So let me whip up the code and see what happens.
    So here's my revised code...


The first thing I did was remove the extra stylesheet links.  I didn't understand about the full and minified versions of the CSS, so I had linked them both (always read the documentation! though that is a little hard with something as complex as JQUI).
    Once I removed the bad link I added the good one.  I'm using the 'structure' and 'theme' files, and I renamed the 'theme' files into something more descriptive.  I've added an id to the <link> for the stylesheet, to make it easier to target later (per the blog I referenced).


With the <head> stuff fixed, time to add the <select> for the theme changer.  Now, I'm not just changing the JQUI theme, I'm also changing the background CSS, so each <option> has a value attribute for the stylesheet link, and also a data-background attribute that is going to change the general CSS.


I'm going to make the <select> a JQUI widget as well, so I've added the code to initialize it in the function that handles all the JQUI setup.  To trigger the theme switch when the user selects an option means setting an event listener for the "change" and not the "click" you use for buttons.  The function does 3 things: it takes the path from the value attribute and changes the stylesheet link the the head section, it clears any light or dark CSS classes, and it applies either the light or dark from the data-background attribute.  I did find something when playing with this, I had originally only set the light/dark on the <body> element - but that didn't change the <textarea> for the notes.  So I'd set the background for the page dark and then have the notes still be white.  That was an oopsie, so I fixed it to change both.
    The last change I made was to set the "dark" CSS class to a dark grey instead of pure black, I just think the grey is a little easier on the eyes...


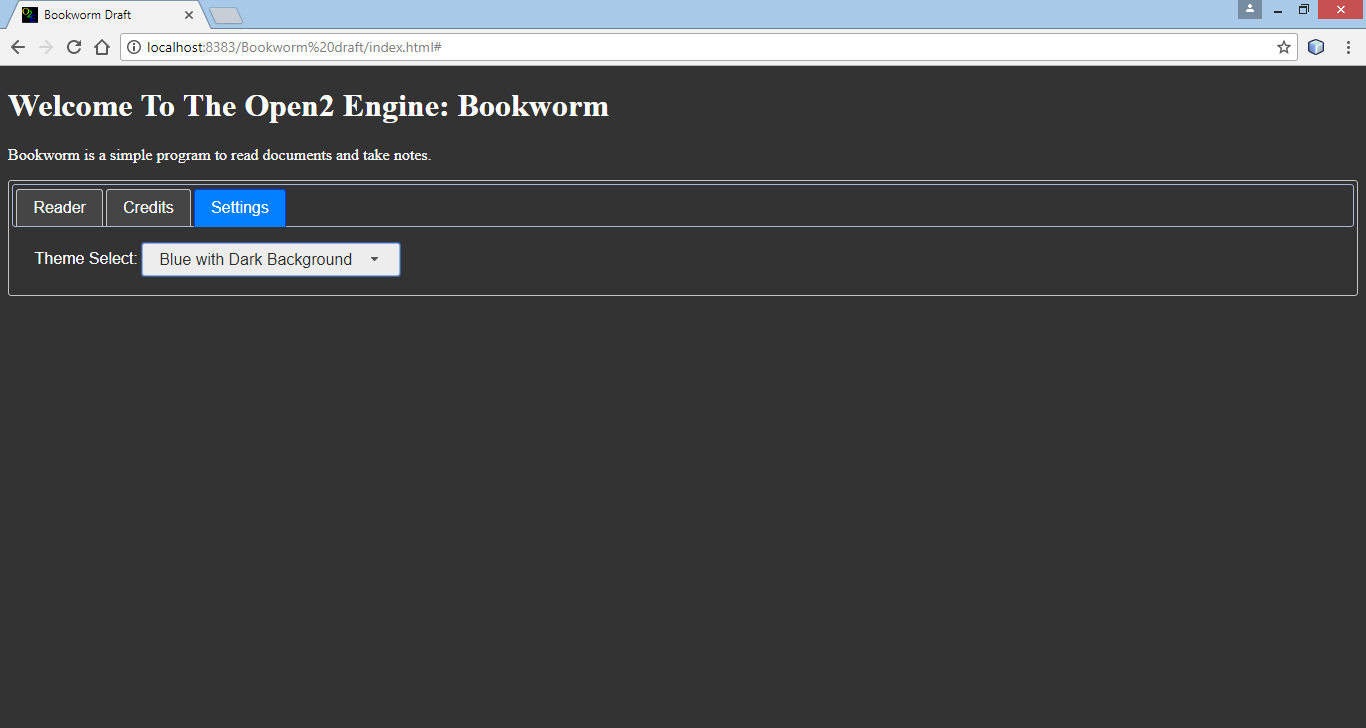
Here's the drop-down...


Which changes the way everything looks, including the textarea...


Woo hoo!!! We've got themes and they work this time :)

    Okay, that actually took a lot of time to figure out.  These posts may not look like much, but between researching, coding, screenshotting, and posting they usually take 4 hours.  Same with this, it took a while to research how JQUI handled themes and how to change themes in general, play with ThemeRoller to get all the colors something I liked, write the code, fix my mistakes when writing the code, take screenshots, and then write and upload the post, images and Google Drive files.  That said, here's the Google Drive link.  So while this did not add a lot of functionality to my little app, it's taken enough of my life to call it a day (in an already busy day, hence my posting this late).  So I'm going to stop here.  Next week I'm moving on to what I expect to be one of the hardest and longest parts, adding an editor that will let the user create their own documents.  Until then!


Friday, October 6, 2017

Open2 Engine: Bookworm - part 2 - Loading and Reading Files

    Okay, last post I went over the general outline for Bookworm, now let's actually start writing some code.  I want to focus on three things right now: formatting my "stories", opening them, and reading them.

The Bookworm Document Format
    Here's how this is going to work.  Bookworm is going to open a plain text file, that is written in HTML but not saved as a webpage (since it will be missing some necessary parts to be a proper HTML document).  That HTML content is going to be appended (or added) to a blank <div> "reading area."  Then the reader can use links to show and hide the text as they read through it.
    Because these files are going to be added to an existing document, while they will be written in HTML they will not have the <doctype> or <head> or <body> sections.  They are just going to be the code that would be within the <body> section (without that wrapper itself).  That code is also going to use the "data-goto" attributes linked to "id" attributes to navigate the document.  Let me show you some of the sample file I wrote:

<div id="0">
<h2>Lorem ipsum</h2>
<p>dolor sit amet, consectetuer adipiscing elit. Aenean commodo ligula eget dolor. Aenean massa. Cum sociis natoque penatibus et magnis dis parturient montes, nascetur ridiculus mus. Donec quam felis, ultricies nec, pellentesque eu, pretium quis, sem. Nulla consequat massa quis enim...</p>
<a href="#" data-goto="1">Next Section</a>
</div>
<div id="1" class="passage">
<h2>Ni! Ni! Ni! Ni!</h2>
<p>...You can't expect to wield supreme power just 'cause some watery tart threw a sword at you! ...You don't frighten us, English pig-dogs...Your mother was a hamster and your father smelt of elderberries! Now leave before I am forced to taunt you a second time! ...</p>
<a href="#" data-goto="2">Next Section</a>
</div>
<div id="2" class="passage">
<h2>Tonight's the night.</h2>
<p>...I'm Dexter. Boo. I love Halloween. The one time of year when everyone wears a mask … not just me... And it's going to happen again and again. It has to happen. I'm really more an apartment person...I'm not the monster he wants me to be. So I'm neither man nor beast. I'm something new entirely. With my own set of rules...</p>
<a href="#" data-goto="3">Next Section</a>
</div>
<div id="3" class="passage">
<h2>Hi. I'm Troy McClure.</h2>
<p>Attempted murder? Now honestly, what is that? Do they give a Nobel Prize for attempted chemistry? Books are useless! I only ever read one book, "To Kill A Mockingbird," and it gave me absolutely no insight on how to kill mockingbirds...Hi. I'm Troy McClure. You may remember me from such self-help tapes as "Smoke Yourself Thin" and "Get Some Confidence, Stupid...Oh, a *sarcasm* detector. Oh, that's a *really* useful invention...Dear Mr. President, There are too many states nowadays. Please, eliminate three...</p>
<a href="#" data-goto="4">Next Section</a>
</div>
<div id="4" class="passage">
<h2>Yo ho ho and a bottle of rum...</h2>
<p>...Pinnace holystone mizzenmast quarter crow's nest ...Shiver me timbers to go on account lookout wherry doubloon chase...p>
<h3>The End</h3>
</div>

    Yeah, I love my alternate lorem ipsum generators :)  So, the basics of the format: each passage except the first has the class of "passage" which has display: none to hide them by default.  Each link is a direct child of the <div> element (that is <div><a></a></div>, basically, it doesn't work if there is another div like <div 1><div 2><a></a></div></div>, it could, just doesn't right now) - and the link has a "data-goto" attribute with the same vaule as the "id" attribute it shows.  I wrote this as a fragment of an HTML page (that is to say, there is no <doctype>, <head> or <body> sections), but it works even with a full webpage.


What it looks like
    So here are some screenshots of Bookworm in action:


Just the two tabs for now, the loader/reader and credits.


Clicking on the "Choose File" button will load a text file.


And all of the display links work.


HTML files work too.  Anything text-based.  The "Load Another File" button will hide the reader and go back to the load section.


The Code
    Okay, let's look at how this was written.  Here is the HTML page, section by section:


<!DOCTYPE html>
<!--
This is my draft of the Open2 Engine "Bookworm", a simple file reader
last updated: 2017-10-04
-->
<html>
<head>
    <title>Bookworm Draft</title>
    <meta charset="UTF-8">
    <meta name="viewport" content="width=device-width, initial-scale=1.0">
    <link rel="stylesheet" type="text/css" href="css/jquery-ui.css">
    <link rel="stylesheet" type="text/css" href="css/jquery-ui.structure.css">
    <link rel="stylesheet" type="text/css" href="css/jquery-ui.theme.css">
    <link rel="stylesheet" type="text/css" href="css/bookworm.css">
    <link rel="shortcut icon" href="favicon.ico" />
</head>

    I'm going to use jQuery UI to make the tabs and some other elements down the road, so in the <head> I'm linking to all of jQuery UI's CSS stylesheets.  I also made a favicon, because the Chrome developer's console keeps throwing an error if one is missing, which is not a big deal, but it annoys me to no end.
    Okay, moving on from the boring stuff...
  

<body>
<!--
SET THE TAB DIV AND HEADERS
-->
<div id="tabs">
<ul>
    <li><a href="#reader_tab">Reader</a></li>
    <li><a href="#credits_tab">Credits</a></li>
</ul>
<!--
LOAD & READ SECTION
-->
<div id="reader_tab">
    <div id="load">
    <h1>Welcome To The Open2 Engine: Bookworm</h1>
    <p>Bookworm is a simple program to read documents.</p>
    <table>
        <tr>
        <td>Select a File to Load:</td>
        <td><input type="file" accept="text/*" id="fileToLoad" onchange='loadFileAsText()'></td>
        </tr>
    </table>
    </div>

<div id="reader" class="passage"></div>
<button id="btnLoadReturn" class="BtnBackToLoad" onclick="backToLoad()">Load Another File</button>
</div>

    jQuery UI makes a tab widget from two parts, the first is an unordered list that creates the tabs themselves, and then <div> elements for the contents of each tab.
    Okay, 3 important things in this part, which is where we'll load and display the file.
    First, the load part - that's done by including a button that opens the filesystem's file picker.  That button is an <input> element with "type=file", and I added "accept=text/*" so that the file picker will only show text-based files.  That's according to the file's MIME-type, which is like a flag saying what the file is made out of.  Plain text is "text/plain" (logical, no?) while HTML is "text/html" since HTML is really plain text that is just interpreted a special way.  This "accept" flag will keep the user from opening a file that can't be shown (hopefully).  Normally you check for user input with JavaScript, but you can define some events in HTML, which is what I've done with this button by putting the "onchange" event to trigger the JavaScript function that will actually read the file.  I'm sure some purists would say you shouldn't mix the "action" of JavaScript with the "structure" of HTML, but I don't see a reason not to.  Actually, I got this from the Mozilla Developers Network.
    Second, there is the blank <div> with "id=reader" - this is where I'm going to put the contents of the opened file.
    Third, there is the button to return to the load section.  That button is not inside the <div> for the reader, since when I load the file I'm going to over-write everything in the <div> (thus, it's empty).  That button just calls a function to hide the reader and show the load section.
    While that's all the active stuff, there is a little more to the page...


<!--
CREDITS SECTION
-->
<div id="credits_tab">
    <p>Bookworm was written by <a href="http://d100mechanic.blogspot.com" target="_blank">The d100 Mechanic</a> and is released under a Creative Commons <a href="file:///C:/Users/user/Documents/Saved%20Documents/Writing%20and%20Creating%20Works/Creative%20Commons/legalcode" target="_blank">Attribution 4.0 International</a> License</p>
    <p>Using the following Javascript Libraries:
        <br><a href="https://jquery.com/" target="_blank">jQuery</a>
        <br><a href="https://jqueryui.com/" target="_blank">jQuery UI</a>
        <br>
        <br>And JavaScript code from the blog: <a href="https://thiscouldbebetter.wordpress.com/2012/12/18/loading-editing-and-saving-a-text-file-in-html5-using-javascrip/" target="_blank">This Could Be Better</a>
    </p>
</div>

</div>
  
    <script src="javascript/jquery-3.2.1.js"></script>
    <script src="javascript/jquery-ui.js"></script>
    <script src="javascript/bookworm.js"></script>
</body>
</html>


    Always have to remember the legal stuff.  So there is a tab for my information, the Creative Commons license I'm releasing this under, and credit where credit is due so links to the sources I used to make this.  The very bottom of the page is where the links to all the JavaScript files are at - that's so that those files are read after the rest of the page has already been processed.  That means I don't need to worry about "document.ready" to load my JavaScript, according to the books I've read.
    Now, when the page loads there is a little flash of unformatted text before jQuery UI takes over to make the widgets.  I'm not fond of that, but it also isn't a huge problem.  I think I'm going to try to make some kind of "load screen" to hide that behind though (later).
    Okay, there's the HTML for the page, let's look at the little bit of CSS I'm using...


/*
This is the CSS code for The Open2 Engine "Bookworm"
*/

.passage {
    display: none;
}

.BtnBackToLoad {
    display: none;
    float: right;
    margin-top: 10px;
}


    Not much here, just the "passage" class to hide everything (I guess I should call it "hidden" really) and the styling to put the "back to load section" button at the bottom right.
    Now on to the real magic, the JavaScript...
  

/*
 * This is the JavaScript code for The open2 Engine "Bookworm"
 */
//function to load all the jQuery UI elements
function jQueryUIsetup (){
    $( "#tabs" ).tabs();
};

    jQuery UI runs a function to create each widget, at the moment there is only 1 for the tabs, but I plan on adding more, so there is a function to hold all those commands.
  

//Set a click handler for the <body> on anything with the attribute of "data-goto"
function setGotoListener() {
    $('body').on('click', '[data-goto]', function (event) {
    //get the data-goto value and convert to a CSS Selector
    let sGoto = "#" + $(this).attr('data-goto');
    //hide the current Passage and show the goto Passage
    $(this).parent('div').hide();
    $(sGoto).show();
    });
};

    This is the function I worked on before that shows and hides passages.  I've talked about it, except for one new feature.  The function starts by selecting the <body> element, then setting a listener (on) for the 'click' event - and then has another selector '[data-goto]' - which is critical.  The passage links don't exist yet, this JavaScript file is going to run when the page is opened, before the user can click on a file to load.  So the event listener is attached to the body of the document, but the second selector means it will only trigger on elements with the "data-goto" attribute within the body.  That way it can listen for elements that will be added later.
  

//Function to load the file and append it to the reader div
function loadFileAsText()
{
    var fileToLoad = document.getElementById("fileToLoad").files[0];

    var fileReader = new FileReader();
    fileReader.onload = function(fileLoadedEvent)
    {
        var textFromFileLoaded = fileLoadedEvent.target.result;
        document.getElementById("reader").innerHTML = textFromFileLoaded;
        $('#load').hide();
        $('#reader').show();
        $('#btnLoadReturn').show();
    };
    fileReader.readAsText(fileToLoad, "UTF-8");
}

    This is the blog code I've mentioned earlier, pretty much exactly.  First it gets the file the user selected.  Then it creates a "fileReader" that is going to process that file.  Next is a function that tells the fileReader what to do: get the text of the file, add it to the "reader" <div>, then show the reader and hide the loader sections.  Finally, it actually kicks off the fileReader to do it's magic.
  

//button to hide loaded file and show load div
function backToLoad () {
    $('#reader').hide();
    $('#btnLoadReturn').hide();
    $('#load').show();
}

//everything defined, so run setup functions
jQueryUIsetup();
setGotoListener();

    The last function to define is the button that will hide the reader and show the loader section.  Doesn't do much.  And with all my functions defined, time to call the ones that have to run on the page load, the jQuery UI setup and adding the event listener.
  

    I'm putting a zip file with the whole code, and a sample text file, on my Google Drive here so you can download it and play with it yourself (should the fancy take you to do so :).
    And that's it.  Not a lot of code, but then it doesn't do a lot right now.  I'm going to fix that though, now that I've got the base "program" working, it's time to start adding features.  One thing I want is to let the user take notes on a document and save those notes, so that's going to be the next feature I'll add.  Until next week!


Friday, September 22, 2017

Open2 Engine: Bookworm - part 1 - Project Outline

    The Open2 Engine is going to be several "programs" that together can create and play Interactive narratives and Role-Playing Games.  The first one I'm going to start working on is "Bookworm."
    Bookworm is simple enough, it is designed to display and create documents.  That doesn't sound very exciting, because it isn't.  It is, however, the foundation for a lot of more advanced programs/ options.  To open a document you need to be able to open a file from the user's computer, to edit or create it you need to be able to organize all that data and write it to the user's computer.  To read it you need to show and hide text.  All of which also needs to be done in a program like, say, Twine - where you load and save the stories you're working on, and then show and hide the document as the reader plays the story.  So while Bookworm is not going to earn me any "cred" as a game developer, it's going to have a lot of code that I'm going to be using for the more interesting programs I work on down the road.
    There are 5 main things Bookworm needs to be able to do:
  • Load
  • Display
  • Annotate
  • Edit/Create
  • Save

Load
    The first thing a book reader needs to do is load a book to read, right?  So how do we load a file from the user's computer?  Well, i actually fond a really cool blog called "This Could Be Better" (I love his blog's name too) that has a post here with some working code to load and save text files.  The system I'm planning has 3 steps:
    First, save the document as HTML, using <div>s and IDs around the content, but not as a full webpage (so no <head> or <body> tags).
    Second, load the file using the code from the site above (which uses the HTML <input type="file"> element, and then creates a hidden link to that file).
    Third, append the contents of that file into a <div> or other holder element.
    I've actually got some code that mostly works for this, just a few bugs to iron out and it'll be ready to rock - super huge thanks to the blogger above (didn't see his/her name anywhere on the site) for giving me most of the code I needed.

Display
    Once we've loaded the document, we need to display it.  This is really, really easy.  I'm going to use the code I posted before to show and hide text.  The only trick is getting the click handlers to see the added text (usually the function that adds the handlers runs when the document loads, so it doesn't "see" the file after it's loaded).  I think I can fix that.
    I'd also like to have a Table of Contents, Index, and let the user create bookmarks of their own, all of which is going to complicate things - but should be fairly do-able.

Annotate
    Besides just showing the document, I want the reader to be able to make notes.  I'm thinking of 2 levels of notes, for the whole document (that would always be visible) and for each specific passage (that would only show up when that passage was displayed, naturally).  This is slightly tricky, but not too hard, the simple way is to add some <textarea>s to hold the plain text notes.  Ideally I'd like "rich text" notes that could be in different colors and fonts, and even to apply a "highlighter-effect" to color the document text.  For a rich text editor I'm going to have to find somebody else's code (that's a concept over my head right now) so I think that'll be a feature for down the road.  I'm not sure how to do the highlighter, I don't want to change the original document.  That one is a very far down the road possibility.

Edit/Create
    Besides reading existing files, I also want to be able to create new ones, using the right format so they'll display correctly (since I'm using the "data-goto" attribute for links, which lines up to the "id" attribute of the text to show - so those two attributes need to line up, which can be tricky when you have 400 of them - in something like an Interactive Narrative story).  I have some ideas for HTML forms in a jQuery-ui Accordion wrapper that I think will work, but there's a lot to track and figure out for this one.

Save
    Lastly, you need to save all this information.  That means I need a separate file (I want to keep the original un-touched) with all the notes and stuff, or to create a whole new file.  That's actually kind of tricky.  The documents are going to be plain HTML, but the notes and such will likely need to be saved in another format.  Right now I'm looking at JavaScript Object Notation (or JSON) which is really easy for JavaScript to natively read/write.

    It doesn't seem like much, but it's going to be enough to keep me busy for a while.  I did a quick mock-up that is surprisingly workable, and depressingly buggy :)  Still, it looks like something I can do, and it's all code that I'm sure will be re-used in other projects down the line.
    So that's the overview, next week I'll start posting my code and you can see what it looks like.  Until then!


Friday, September 15, 2017

The Open2 Engine - part 7 - Dream The Impossible Dream

    Okay, so the last week has laid a lot of groundwork for my Open2 Engine project.  Time to look way, way down the road at where I want to go with all of this.
    I've always liked to take the long view, and so what exactly do I want the "Open2 Engine" to be when it's all said and done?  Well, that's actually a pretty crazy thing, because I want it to be something that - at the moment - I can't do/ create.  I actually see the Open2 System as comprising several parts...
  1. Rulebooks - these are all the OGL resources, and the games of my own that I make from them.
  2. Worlds - while having a generic game gives you some flexibility to adapt it to your own world, having a specific world also really helps to make the game come to life.  I want to create a few settings/ game worlds and also provide them free/openly (under a Creative Commons license I'm thinking).
  3. Modules - I also want to make some adventures and campaigns; in an ideal world that were system-neutral, you could take the story itself and add whatever specific Rulebook you wanted to it (that is hard though because mechanics do drive story to some degree).
  4. Engines - this is the biggest part, the "Engines" are how the reader/ user interacts with all this stuff, and there are several I want to make...
    • Bookworm is a simple reading app, basically the ability to show and hide text I did in yesterday's post.
    • PChelper is a reader that also has code to create and play characters.
    • GMhelper is a reader that also helps GMs create and run adventures.
    • Listener is a parser-based Interactive Narrative editor and player.
    • Weaver is a hypertext-based IN editor and player; basically Twine.
    • VizTalk is a visual novel-based IN editor and player.
    • HCDcrawler is a game interface for an RPG inspired by the SSI "Gold Box" AD&D games like Pool of Radiance and Curse of the Azure Bonds.
   Is that an overly-ambitious goal?  Yeah, it sure is.  I don't care though.  I'll figure it out one piece at a time.  It's also going to be very tricky to structure, I want this to be very flexible, something that you can mix and match - which means I'm going to have to carefully structure my code and data in a way that will allow that to happen.
    So, from here I'm going to shift from looking at the project in general to examining each specific component and how it will relate to the others.  Also, I've been posting every day for about a week now, which has left me a little tired :)  So on Monday I'm going to take a look at the 5e SRD - how the game is structured, how that structure compares to other OGL games, and an "under the hood" "deep dive" into building off that structure to create a game of my own.
    Until then, I hope you have a good weekend!


Thursday, September 14, 2017

The Open2 Engine - part 6 - Twine-like Text


    Now I'm going to pull together some of the things I've been talking about in my whirlwind series. And, if I can get it to work, I'm going to do so in this very post.

    So my first sample project is going to show and hide text like Twine does. There's a thing called Lorem ipsum, it's placeholder text, and I found some cool alternate ones on-line that I'm going to use to fill in my example passages below.

Lorem ipsum dolor sit amet, consectetur adipiscing elit. Duis tincidunt dapibus posuere. Nam dapibus, ante eget fermentum accumsan, ex orci facilisis purus, dignissim pretium nisi quam at erat. In faucibus purus sit amet sodales lobortis. Ut ullamcorper mollis dolor, non dictum justo venenatis ac. Nulla eu rhoncus neque, vel finibus urna. Integer vitae est tortor. Vivamus pellentesque vel diam volutpat mattis. Quisque aliquet turpis vel lectus blandit, ut elementum risus laoreet. Aliquam erat volutpat. Nulla facilisi. Praesent gravida tellus in ligula hendrerit feugiat. Fusce sodales porta nisi, eget vulputate enim. Aenean at rutrum tellus. Phasellus tincidunt lacus a augue suscipit, et pharetra eros suscipit. Integer nulla enim, porttitor in luctus sed, vestibulum quis lorem.
Next Passage
You're all clear, kid. Let's blow this thing and go home!Ye-ha! I can't get involved! I've got work to do! It's not that I like the Empire, I hate it, but there's nothing I can do about it right now. It's such a long way from here. The Force is strong with this one. I have you now.Don't be too proud of this technological terror you've constructed. The ability to destroy a planet is insignificant next to the power of the Force. Hey, Luke! May the Force be with you. Look, I can take you as far as Anchorhead. You can get a transport there to Mos Eisley or wherever you're going. I want to come with you to Alderaan. There's nothing for me here now. I want to learn the ways of the Force and be a Jedi, like my father before me.Leave that to me. Send a distress signal, and inform the Senate that all on board were killed. Escape is not his plan. I must face him, alone. I care. So, what do you think of her, Han? I care. So, what do you think of her, Han? Dantooine. They're on Dantooine. I find your lack of faith disturbing.
Next Passage
Knights of Ni, we are but simple travelers who seek the enchanter who lives beyond these woods. I don't want to talk to you no more, you empty-headed animal food trough water! I fart in your general direction! Your mother was a hamster and your father smelt of elderberries! Now leave before I am forced to taunt you a second time! Shut up! Will you shut up?! Oh, ow! Well, how'd you become king, then? Camelot! Shut up! But you are dressed as one… Burn her anyway! I dunno. Must be a king. And the hat. She's a witch! A newt? Found them? In Mercia?! The coconut's tropical! You don't vote for kings. I have to push the pram a lot.
Next Passage
Smooth as an android's bottom, eh, Data? Mr. Crusher, ready a collision course with the Borg ship. You did exactly what you had to do. You considered all your options, you tried every alternative and then you made the hard choice. Our neural pathways have become accustomed to your sensory input patterns. You're going to be an interesting companion, Mr. Data. They were just sucked into space. A lot of things can change in twelve years, Admiral. That might've been one of the shortest assignments in the history of Starfleet. Wait a minute - you've been declared dead. You can't give orders around here. I think you've let your personal feelings cloud your judgement. Captain, why are we out here chasing comets? Some days you get the bear, and some days the bear gets you. Is it my imagination, or have tempers become a little frayed on the ship lately? Maybe we better talk out here; the observation lounge has turned into a swamp. Well, that's certainly good to know. When has justice ever been as simple as a rule book? Talk about going nowhere fast. Fate. It protects fools, little children, and ships named "Enterprise." I'll be sure to note that in my log. Yesterday I did not know how to eat gagh. I'll alert the crew. Why don't we just give everybody a promotion and call it a night - 'Commander'? Travel time to the nearest starbase? Computer, lights up! Mr. Worf, you sound like a man who's asking his friend if he can start dating his sister.
Next Passage
Th’art nesh thee nay lad soft lad wacken thi sen up t’foot o’ our stairs. Nay lad where’s tha bin. Th’art nesh thee a pint ‘o mild any rooad t’foot o’ our stairs. Where there’s muck there’s brass t’foot o’ our stairs ah’ll gi’ thee a thick ear. Ah’ll learn thi tintintin tell thi summat for nowt soft lad mardy bum. Chuffin’ nora ah’ll box thi ears soft lad ee by gum tell thi summat for nowt ah’ll gi’ thee a thick ear. Bobbar nay lad. Breadcake soft southern pansy wacken thi sen up. Be reet where’s tha bin mardy bum mardy bum. Tell thi summat for nowt where there’s muck there’s brass shu’ thi gob. Dahn t’coil oil. That’s champion ey up will ‘e ‘eckerslike shurrup by ‘eck. Eeh. Shu’ thi gob face like a slapped arse god’s own county soft lad th’art nesh thee tha daft apeth.

The End


    Let's look at the code that makes this work...
    First, we need to set up the page.  In this case I'm using a bunch of HTML <div> tags to separate each passage.  I need to be able to pick out each one to show or hide, so I'm giving each an ID attribute.  They are all going to have some light blue text, for this example, so I'm giving them a class of "example" - and they are all going to start hidden, except for the first one, so I'm giving them another class of "passage" - which looks like this...

<div class="example" id="1"></div>
<div class="example passage" id="2"></div>
<div class="example passage" id="3"></div>

    The CSS to make the text color and hide the passages looks like this...

.example {color: LightSteelBlue;}
.passage {display: none;}

    Now I need the links, the way to change the passages.  I'm using a plain anchor link, with a target of "#" as a placeholder, and I'm adding a special attribute.  HTML 5 let's you make up your own attributes starting with "data-".  I'm going to add a "data-goto" attribute to each link, and the attribute's value is going to be the ID of the passage to show.  Adding some placeholder text and the links makes my HTML look like this:

<div class="example" id="1">
    Sample Text
    <a href="#" data-goto="2">Next Passage</a>
</div>

<div class="example passage" id="2">
    Sample Text
    <a href="#" data-goto="2">Next Passage</a> </div>

<div class="example passage" id="3">
    Sample Text
    <a href="#" data-goto="2">Next Passage</a> </div>

    Now, I need to use some JavaScript to make the links show and hide the passages.
    I'm going to use jQuery to get the anchor links.  Thing is, what if I didn't know how many links there were going to be?  And what if I wanted some regular links and some links that changed passages?  What if I wanted to use buttons or images along with anchor links?  Well, then I should set my code to look for anything that had the "data-goto" attribute, whatever element that is, and ignoring all others...

$('[data-goto]')

Okay, that will add this to just the elements I want.  Now, I need to set a "click handler" - a function to run when the user clicks on the link/whatever...

.on('click', function (event) {

Now for the function itself.  I want to do two things, hide the current passage and show the next one.  Hiding the current passage is easy, I'm going to get the parent <div> of the link (that's the <div></div> that's around the link), I'll get that in two steps.  First I need to select the link that's been clicked on.  The event handler passed along the event itself as a parameter, that set something called "this".  "This" is a context, a reference to the calling object (it's really complicated, which is why I didn't mention it before - just roll with it).  By selecting "this" I can then use the jQuery method of .parent() to get a parent of the link, in this case the <div>.  Lastly I can use another method .hide() to hide that div.  Yeah, it's complicated to describe it, but it's actually pretty simple - and it's just one line of code...

    $(this).parent('div').hide();

With the current passage hidden, I just need to show the next one.  I'm going to have to select the next passage, which I'm doing by using the same number in the "data-goto" attribute of the link and the "id" attribute of the passage.  To select an ID with jQuery you add a hash, "#", so I'm going to make a string with the hash and number.  Then, I'll make the selection with that string and use the method .show() to show the new passage...

    let sGoto = "#" + $(this).attr('data-goto');
    $(sGoto).show();

Finally, I'm using return false to stop the default behavior of the anchor link.  I didn't do this in a separate page I created, but when I copied the code onto Blogger I had the links do weird things, so this just tells Blogger to ignore my special links...

return false;
});

And there you go, you now have a way to show and hide passages just like Twine!

    I did want to add another little project, a tiny Parser game, but my code is not liking me today - so that'll be an upcoming update :)


Wednesday, September 13, 2017

The Open2 Engine - part 5 - Whirlwind JavaScript

    Okay, with HMTL we made a document, CSS made that document pretty, now with JavaScript we can make that document act and react.  So let's do another Flash-fast tour, hold on to your hats...

Variables
    Okay, let's start with variables - how we store data.  If our program is going to do something, odds are it's going to need to remember information.  A variable is just that, a place to put some data.  Creating a variable is usually with "var" like this...

var variableName = "data";

    Now, the "variableName" is an example of "Camel Case" which is the JavaScript convention of naming everything with a lower-case word, and adding capitalized words after to create a descriptive name.  You could name a variable anything beginning with '$', '_', or a letter - after which you can use the same and numbers (so can't start with a number, can use it later though).
    Variables come in different types, and the one I made above is a "string" - a series of numbers/letters/symbols, like a sentence.  Since a string is created by using quotes, if you want quotes in the string itself you've got to mix them...

var htmlElement = 'myElement attribute="value" something';

or you have to "escape" them with the backslash...

var htmlElement = "myElement attribute=\"value\" something";

Notice that I've put a semicolon at the end of each line, the semicolon is used to tell JavaScript where the end of a command is at (like how a period shows the end of a sentence).

    Instead of making a string, I could make a number, like so...

var myNumber = 10;

However, JavaScript is a "loosely typed" language, which means a variable can be just about anything.  That will occasionally make life interesting when a variable is not what you think it is.       
    Here's an example, let's add two numbers together...

var A = 1;
var B = 1;
var C = A + B;
console.log(C);
>2

Okay, the "console" is a hidden developer tool (you can access it from a browser or your programming IDE, you can't see it with just a text editor).  I'll use the ">" at the start if a line to show what the console would output (if you were running this and not reading it :).  So in our example above we get just what we expect, we set two variables, each is equal to the number 1, and we add them together to get the number 2.
    But what if we accidentally put some quotes around one of our variables?  Like this...

var A = "1";
var B = 1;
var C = A + B;
console.log(C);
>11

Huh?  Well, by putting the quotes around the first variable we turned it into a string instead of a number, and addition on a string becomes "concatenation" (or, combining the contents of two strings into one)...

var A = "this";
var B = "WORD";
var C = A + B;
console.log(C);
>thisWORD

    Because JavaScript doesn't track variables too closely, I like to do it myself (this number/string thing has bit me on the rump before) so I can remember what something is.  Camel Case is not very descriptive to me, I prefer something called "Hungarian Notation" where you prefix every variable name with the type of data that variable is supposed to hold.
    So, the way I would write a string is to start with the letter "s" (for string)...

var sFirstName = "Bob";
var sAddress = "123 Lane";

    Most numbers I've had to track were whole numbers, or integers, so they start with "i"...

var iLocationsDiscovered = 0;
var iHitPoints = 20;

    There's not really a right or wrong way, it depends on your audience.  If you're programming as a part of a team, you should use whatever naming convention the team uses (duh).  Since I'm writing this by myself (and I'm old and crotchety) I'm going to use my own style of naming (which you should know since you're going to have to read it :).

    In my projects so far, pretty much the first thing I've done is start declaring the variables I'm going to need.  But, while strings and numbers are nice, they are pretty much just one piece of information per variable, what if we wanted to store several bits of data in one place?


Arrays
    Think of a backpack.  It's a single object, but it can contain multiple items within itself.  That's basically an Array.  We define an array with brackets, and separate the items within by commas...

var aBackpack = [rock, knife, apple];

So how do we find something in the array?  By using it's "index", which is a number - starting with zero! - that points to the array's contents...

console.log(aBackpack[0]);
>rock

console.log(aBackpack[1]);
>knife

console.log(aBackpack[2]);
>apple


We can also make an empty array and then define the contents like variables...

var aBackpack = [];
var aBackpack[0] = "rock";
var aBackpack[1] = "knife";
var aBackpack[2] = "apple";

Arrays also have "methods", special commands we can call to interact with the array.  One is "push" which adds an item to the end of the array.  "Pop" will delete the last item, and "length" will say how many items are in the array...

var aBackpack = [rock, knife, apple];
console.log(aBackpack.length);
>3

aBackpack.push(potion);
console.log(aBackpack);
console.log(aBackpack.length);
>rock, knife, apple, potion
>4
 
aBackpack.pop;
console.log(aBackpack);
>rock, knife, apple


    Arrays can hold any kind of data, strings, numbers, even other arrays!  Arrays can also hold objects...


Objects
    Like an array, an Object is a way to group several variables together.  Objects are made with curly braces "{ }" and hold key: value pairs...

oPlayer= {
    Name: "Bob",
    Class: "Fighter",
    Strength: 10,
    hitPoints: 20,
    Backpack: [rock, knife, apple]
};

These are all "properties" and can be accessed with "dot notation" or the objectName.propertyName...

console.log(oPlayer.Name);
>Bob

console.log(oPlayer.Backpack[1]);
>knife

    We can also give objects "methods" or commands that they can carry out, and we can add a property or method by defining the object with it...

oPlayer.Punch = function () {
    console.log("pow!")
};

oPlayer.Punch();
>pow!

    Objects are a great way to keep information together, but let's look at how to actually act on that information with functions...


Functions
    Data just sits there, to act on it we need functions.  Declaring a new function looks like...

function functionName (parameters) { commands };

Let's make a hypothetical "Attack Turn" function, we'll have a monster attack a character (which will be a nice complex example).  Virtually every function is going to act on some variables, so let's think about the ones we need.  We're going to need a monster and a player, so we'll make them 2 objects.  Each is going to need a chance to hit, which we'll turn around and say is a % chance "to be hit" (you'll see).  Each is also going to need the damage they do, and the health they have.  That should do for a bare-minimum example.  So here are my two objects...

oPlayer = {
    ToBeHit: 40;
    Health: 20;
    Damage: 5;
};

oMonster = {
    ToBeHit: 60;
    Health: 10;
    Damage: 10;
};

I'm giving my player lower odds of being hit, but the monster does more damage (just because, it's an example :).
    Now, the first things we need to create our function is a name and the parameters.  "Parameters" are just variables we're going to pass to the function for it to work on.  In this case, I'm going to pass two parameters, the attacker and the defender.  So I've got this...

function fAttackTurn (attacker, defender) { };

Okay, now we need the code, the commands of what the function should do.  There are some functions that JavaScript has created for us, one of them is "Math.random" which we can use to get a random number.  So we're going to get the chance to hit needed, then a random number between 1 and 100, compare the two, and if the random number is lower than or equal to the chance to hit, we'll do the attacker's damage to the defender's health.  This should show us a lot of what functions can do.
    First, inside the function let's make a variable for the attack roll (our random number)...

function fAttackTurn (attacker, defender) {
    var iAttackRoll;
};

Well, that makes an "undefined" variable, one that has no value (not even zero).  Let's make it equal to the JavaScript function for our 1-100 number (which is, well, complicated)...

function fAttackTurn (attacker, defender) {
    var iAttackRoll = Math.floor(Math.random () * 100) + 1;
};

Yeah, it's a bit complicated, functions can get that way.  Anyways, that will give us a random number between 1 and 100.  So let's compare that number to the defender's odds of being hit and see if it's less than or equal to (a hit) or greater than (a miss)...

function fAttackTurn (attacker, defender) {
    var iAttackRoll = Math.floor(Math.random () * 100) + 1;
    if ( iAttackRoll <= defender.ToBeHit){

    } else {

    }
};

Well, what do we want to do?  Either way let's do the console.log of what we got, and if we do hit then we want to subtract the attacker's damage from the defender's health...

function fAttackTurn (attacker, defender) {
    var iAttackRoll = Math.floor(Math.random () * 100) + 1;
    if ( iAttackRoll <= defender.ToBeHit){
       console.log("You hit!")
       defender.Health = defender.Health - attacker.Damage
    } else {
       console.log("You missed!")
    }
};

Okay, let's stop and look at how we'd "call" this function, or run it.  We'll have the monster attack the character...

fAttackTurn (oMonster, oPlayer)

To have the player attack the monster, we reverse the parameters...

fAttackTurn (oPlayer, oMonster)

    Okay, so let's stop and look at some of that function in more detail.


Decisions and Loops
    One of the things our "Attack Turn" function had to do was make a decision - it had to decide if the attack roll was higher than the defender's defense.  To do that we used an "if" statement

if ( iAttackRoll <= defender.ToBeHit)

If has a lot of ways to compare things (and thus, it's a pretty common way to make decisions)...

if ( this > that )  - greater than
if ( this >= that )  - greater than or equal
if ( this < that )  - less than
if ( this <= that )  - less than or equal

To compare if two things are equal is a little tricky, one way is like this...

if ( this == that)

One equal sign "sets" a variable to a value, 2 equal signs "compares" two variables/values.  The catch is that 'number as a string' problem at the beginning of the post.  Let's make 2 numbers and compare them...

var A = 1
var B = 1
if ( A == B ) {
    console.log ("true!")
}
>true!

Now, let's make one of those a string instead of a number...

var A = "1"
var B = 1
if ( A == B ) {
    console.log ("true!")
}
>true!

Well, that's still true even though one variable is a string and the other is a number.  We might not want that, we might want to only compare numbers to numbers or strings to strings.  That takes three equal signs, and while the code in the "if" will run if that's true, let's add the "else" to run code if it's false...

var A = "1"
var B = 1
if ( A = = = B ) {
    console.log ("true!")
} else {
    console.log("false!")
}
>false!

I spaced out the equals signs to show there are 3 of them, called "strict equality".

    "If" is the most common way to make a decision, but sometimes we need to "loop" or go through a series of values and check each one.  Let's say we want to look in the player's backpack and see if they have a knife.  The most common loop is "for"...

for ( counter ; comparison ; operation ) {
    do something
}

So, first we create a counter, which is a variable almost always called "i", and we set a starting value...

for ( i = 0 ; comparison ; operation ) {
    do something
}

Next we compare where we are (with our counter) to where we want to be (or the end of the loop, which in this case is the length of the player's backpack)...

for ( i = 0 ; i < backpack.length ; operation ) {
    do something
}

Why not go until i <= backpack.length?  Because the loop is always going to run the first time, so we want to stop before the length or else we'd run one time too many.
    Lastly, we need to increase our counter (otherwise we won't go forward) which is usually with the "increment" operator, which takes a variable and adds 1 to it...

for ( i = 0 ; i < backpack.length ; i++ ) {
    do something
}

And then we'd add the code to see if the backpack item we were looking at was the one we wanted.  Which I'll leave as an exercise for the reader :).


Manipulating The DOM
    Okay, I need to wrap this up because I've been typing for a few hours now!
    So far we've just looked at JavaScript itself, how do we get our JavaScript to interact with the webpage?  Well, we use the DOM, or Document Object Model.  Basically, JavaScript itself gives us a few functions to access parts of the page.
    There are 3 main functions we can use to select something on the page.  If we want to get a tag (like <p> or <div>) we'd use...

document.getElementsByTagName("p")
document.getElementsByTagName("div")

    If we want to get an element by it's class (let's say the class is "yellowtext"), we'd use...

document.getElementsByClassName("yellowtext")

    And to get an element by it's ID..

document.getElementById("id")

     We can also change the content of an element with...

element.innerHTML = new html content

    I'm actually not going to go into this in any detail, while you can access elements from JavaScript I really prefer to use a JavaScript library called jQuery which is a lot easier to use (and type) - I'll go into jQuery when I start using it on the project.


Events
    Last thing to mention, and again it's time to wrap this up - we can also listen for "events" something that the user does.  So we can listen for a "click" event and do something when the user clicks on a button, or a "mouseover" event for when the user moves the mouse over an element.  Again this is something that can be done in JavaScript, but I'm going to use jQuery for - and I'll be able to give you some concrete examples once the project gets rolling.


    Wow, that was a lot - and even though I always say I've only scratched the surface, in this case that's an understatement!  There is so very much more of JavaScript to cover - which is why it's usually discussed in something the size of a book!

    This finishes the last of my 'whirlwind' tours, next post we're going to actually make something using HTML, CSS and JavaScript.  As I've mentioned before, my recommended starting point to learn more is the w3schools site.
    Until tomorrow!


Tuesday, September 12, 2017

The Open2 Engine - part 4 - Whirlwind CSS

    Yesterday I gave a dazzlingly-brief overview of HTML, today I'm going to do the same for CSS.  While HTML is about defining the elements on a page, CSS is about how to show those elements.  So let's jump right in...

    First, how do we tell the page where to find the CSS?  Well, there are 3 ways.  First there is "in-line" where we define the CSS in the HTML page right at the element that we're styling.  You might have noticed that yesterday when I was styling the <div> and <spans>...


In the code on the left you can see the attribute "style" in the <div> and <span> elements.  That's the in-line styling.  But we can also put the styling at the top of the page, in the <head> section.  If we do that, though, we need some way to tell the style what elements to style.  So, we can add a "selector" saying what elements to apply the style to.  In this case, we'll add the blue border to every <div> tag and the red border to every <span> tag...


The third way we can add styling is perhaps the most common, we'll link to an external file.  We first create the link by adding a line to the <head> section pointing to our stylesheet file (which is usually "default.css" or something similar).  Then, in the stylesheet we'll change styling by element to styling by class, which looks like .className (a period and then the name)...


If we want to style by an ID, we write it this way: #IDname (the hash, or pound sign, then name)...


    Okay, so that's a quick look at where to put styles and how to select the elements to style, so what all can we do with CSS?  Well, we've looked at the "border" property - the quick version of it takes the size of the border (which I'm giving in "pixels" (px)), then the style of the border (a solid line so far), and then the color of the border.  Let's look at a few more borders...


    Besides styling around an element with a border, we can also style an element itself...


    Another really big thing we use CSS for is positioning.  Getting everything exactly where you want it is tricky, because you have no idea what device the user is on, a 32" desktop monitor or a 5" phone?  Is the browser taking up the whole window or, like me in these examples, is the browser only filling up half the screen?  Browsers try to dynamically grow and shrink elements to fit in the best way possible - using CSS we can force elements to be positioned a certain way.
    Let's start be forcing how big something should be...


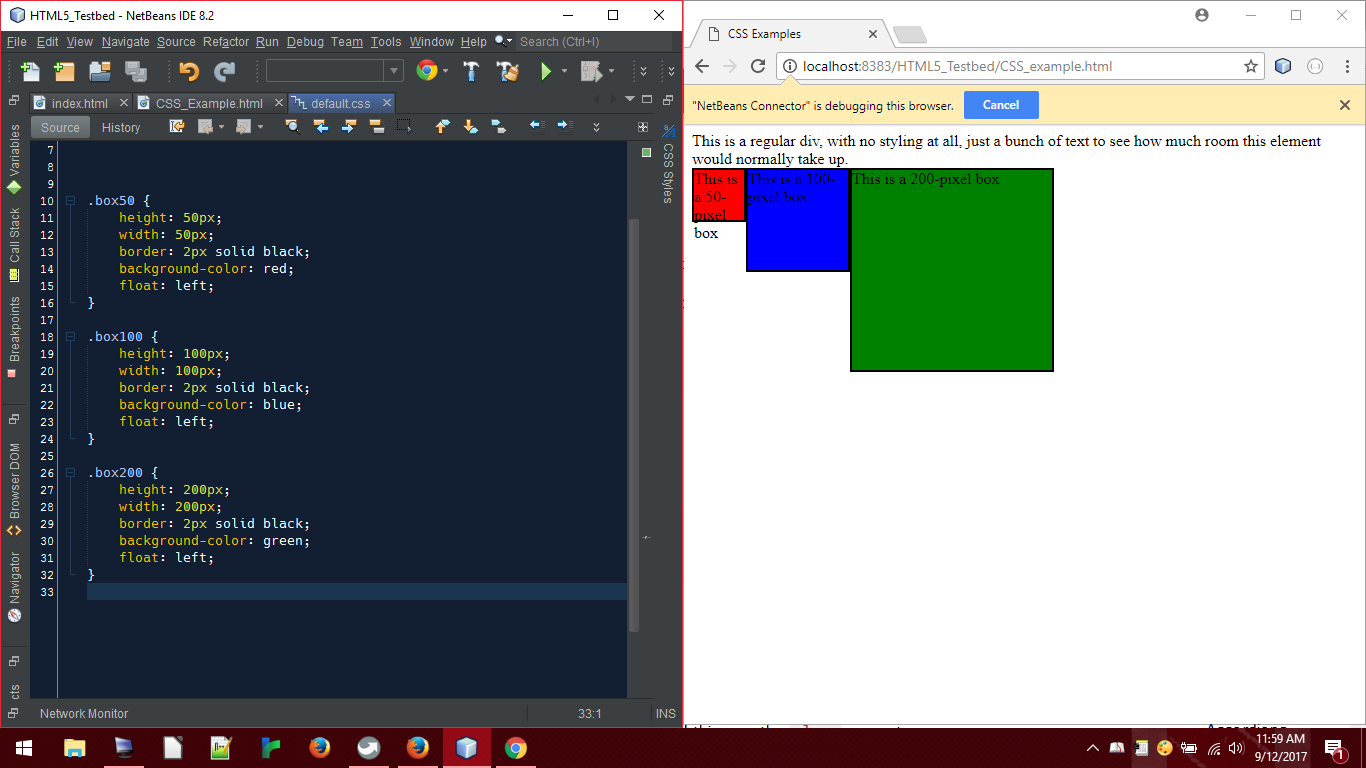
    The boxes look weird all lined up vertically, let's arrange them horizontally by using the property float: left...


    The little 50px red box is too small for the text in it, so let's set the overflow: hidden property to hide the excess (we could also set overflow: scroll if we wanted to add scrollbars, but those would look weird on such a small element)...


    I've been hard-coding sizes with pixels, we could also set the size as a percentage of the screen...


    We set the "padding" to put empty space between the contents and the element...


    And setting a "margin" will put empty space between the element and other elements...


    We can also define where an element should appear relative to another element or the screen itself.  Here is a <div> with a black background and some red, blue and green <div>s within it.  This is how they look with no positioning at all...


    Here they are with the float: right for the red box and float:left for the green and blue...


    Now I'm going to set clear: left for the blue box, which will move it down ("clearing" any elements from being on it's left side)...


    The position property describes where to place things on the screen.  Setting position: absolute will let you give a distance from the container (from the top and left sides here) to display each element at...


    While we defined our own classes for the elements, CSS also has "pseudo-classes" that describe how an element is interacted with.  Here I'm adding the pseudo-class :hover so that when the mouse hovers over the red box it will turn white...


    Okay, again I am only giving the quickest introduction to CSS here, something to hopefully let you start imagining how you can position and style the elements of your pages.  For a far better description of CSS, and a great reference, visit the w3schools.
    One more whirlwind tomorrow when I'll go over JavaScript.  Then, on Thursday I'll pull it all together and show you how to make a Twine-like display using all three.  Until then!